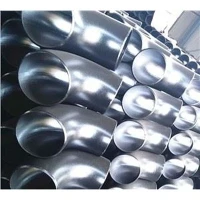
Installing a carbon steel elbow correctly is crucial for ensuring the efficiency and longevity of piping systems. As a reliable carbon steel elbow supplier, I understand the importance of proper installation procedures. In this blog post, I will share some essential steps and tips on how to install a carbon steel elbow correctly.
Pre - installation Preparation
Before you start the installation process, it's essential to conduct a series of preparations. First, you need to select the right type of carbon steel elbow for your project. For instance, if you are working on a project that requires compliance with American National Standards Institute (ANSI) specifications, you might consider an ANSI Carbon Steel Elbow. These elbows are designed to meet the strict quality and dimensional requirements set by ANSI, ensuring compatibility with other ANSI - compliant components in your piping system.
Another option is the Q235 Carbon Steel Elbow. Q235 is a common type of carbon steel with good plasticity, toughness, and weldability. It is suitable for a wide range of general - purpose piping applications.


Inspect the elbow thoroughly for any visible defects such as cracks, dents, or uneven surfaces. A damaged elbow can lead to leaks or structural failures in the piping system. Check the dimensions of the elbow to ensure it matches the pipes it will be connected to. Measure the outer diameter, wall thickness, and angle of the elbow accurately.
Clean the surfaces of the elbow and the pipes that will be joined. Remove any dirt, rust, grease, or debris using a wire brush, sandpaper, or a suitable cleaning solvent. A clean surface is essential for a strong and leak - free joint.
Installation Steps
Step 1: Positioning
Determine the exact location where the carbon steel elbow will be installed in the piping system. Mark the position on the pipes clearly. Make sure the elbow is oriented correctly according to the flow direction of the fluid or gas in the system. The angle of the elbow should match the design requirements of the piping layout.
Step 2: Alignment
Align the elbow with the pipes precisely. Use alignment tools such as clamps or welding jigs to hold the elbow in place. Ensure that the centerlines of the elbow and the pipes are in line with each other. Misalignment can cause stress concentrations in the joint, leading to premature failure.
Step 3: Joint Preparation
Depending on the type of joint you are using, prepare the ends of the elbow and the pipes accordingly. For a Butt Weld Elbow, bevel the ends of the pipes and the elbow to create a proper welding groove. The bevel angle typically ranges from 30° to 37.5°. The root face should be between 1 - 3 mm, and the root gap should be around 2 - 3 mm.
Step 4: Welding (for Butt - Welded Joints)
If you are using a butt - welded joint, select the appropriate welding process and filler material. Common welding processes for carbon steel elbows include shielded metal arc welding (SMAW), gas metal arc welding (GMAW), and submerged arc welding (SAW). The choice of filler material depends on the composition of the carbon steel. For Q235 carbon steel, ER50 - 6 is a commonly used filler wire.
Follow the welding procedure specification (WPS) carefully. Pre - heat the joint if required, especially for thicker walled elbows. Start welding from the root pass and gradually build up the weld layers. Make sure the weld is uniform and free of defects such as porosity, cracks, or lack of fusion.
Step 5: Non - destructive Testing
After welding, conduct non - destructive testing (NDT) on the joint. Common NDT methods include ultrasonic testing (UT), radiographic testing (RT), and magnetic particle testing (MT). These tests can detect internal and surface defects in the weld, ensuring the integrity of the joint.
Step 6: Post - welding Treatment
If necessary, perform post - welding heat treatment (PWHT) on the joint. PWHT can relieve residual stresses in the weld, improve the mechanical properties of the joint, and reduce the risk of stress - corrosion cracking. The PWHT parameters such as temperature and holding time depend on the type of carbon steel and the thickness of the joint.
Step 7: Connection to Other Components
Once the elbow is properly welded and tested, connect it to other components in the piping system such as valves, flanges, or pipes. Make sure all connections are tight and leak - free. Use appropriate gaskets and bolts for flange connections.
Tips for Correct Installation
- Follow Safety Procedures: Wear appropriate personal protective equipment (PPE) such as welding helmets, gloves, and safety glasses during the installation process. Ensure proper ventilation in the work area, especially when welding.
- Use the Right Tools: Use high - quality tools for installation, such as wrenches, clamps, and welding equipment. Using the wrong tools can damage the elbow or lead to improper installation.
- Consult the Manufacturer's Instructions: Refer to the manufacturer's installation instructions and guidelines for specific information about the carbon steel elbow you are using. The manufacturer can provide valuable advice on installation procedures, welding parameters, and maintenance.
- Inspect the Installation Regularly: After the installation is complete, inspect the piping system regularly for any signs of leaks, corrosion, or damage. Early detection of problems can prevent costly repairs and downtime.
Conclusion
Installing a carbon steel elbow correctly is a multi - step process that requires careful planning, precise execution, and strict adherence to safety and quality standards. By following the steps and tips outlined in this blog post, you can ensure a successful installation of carbon steel elbows in your piping system.
As a carbon steel elbow supplier, we are committed to providing high - quality products and professional technical support. If you have any questions about carbon steel elbows or need assistance with your piping project, please feel free to contact us for procurement and further discussions. We look forward to serving you and helping you achieve the best results in your projects.
References
- ASME B31.3 Process Piping Code
- AWS D1.1 Structural Welding Code - Steel
- API 5L Specification for Line Pipe